Day 1 of project:
Again, the point of this project is to light up these side emblems:
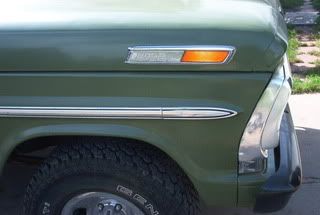
So today I went shopping for some parts needed to complete this:
-With the advice of 70shortwide, I decided to use a florescent light cover. I found on the internet that there are several different varieties. So I went out to Home Depot, they only had one variety of cover and it was the one that had small circles in it. That wasn't even close to what I had in mind so we went next door to Menards. They had several varieties of covers and I was able to find one that had small square in it. I ended up buying lighting panel made of Acrylic for about $7. If you can't find it ask an employee where they have their suspended ceiling items at.
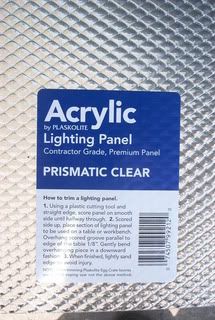
- I also picked up some everyday clear Silicone sealer and....
- Some quick set JB weld for the project
- You will need some sort of lamp holder, I used 2 side parking light lamp holders left over from the parts truck
- and of course you will need some metal to fabricate a housing for the lamps.
So we now start the work. Remove the emblems from the truck. They are held on with two 7/16" speed nuts.
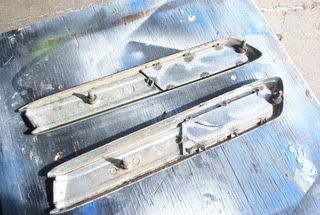
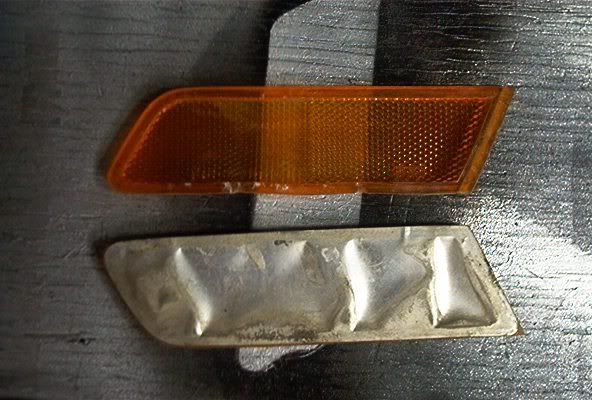
Now you have to remove the reflector from the emblem. I did this by prying back the 7 mounting tabs located on the outside perimeter of the reflector. You could use a flat screwdriver or perhaps a pair of diagonal wire cutters for this. From there you can remove the reflector assembly. Do both the passenger side and driver side emblems.
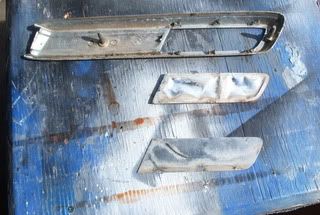
There are 3 pieces to the reflector: 1- the reflector itself, 2- an aluminum foil type of material glued to the back of the plastic reflector, and 3- a piece of shiny metal for the back of the reflector assembly. This backing plate is very important to the project as it is the precise shape of the items we need to fabricate. When you disassemble this piece, notice the orientation of it. Mark the side that was facing the reflector itself as "outward."
Seen here you can see the plastic reflector and and aluminum foil type stuff removed from one of the reflectors. This makes it easy to use your reflector as a lens if it is in good shape by just removing the metal film from the back of it.
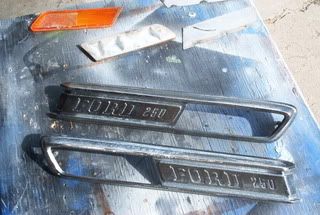
Dissasembly complete, I moved on to making the emblem housing looking better. My emblems were in bad shape and the chrome was pitted badly. So I used an air powered angle grinder to smooth down the entire surface of the chrome. The only other option was to remove all the chrome by using electrolysis and acid, but no thanks. So as it ends up I will need to paint my emblems a shiny silver before they are reassembled.
At this point if you smooth out your chrome or not, you need to grind any little edge left over from when you removed the reflector assembly. The 7 mounting tabs are what I'm talking about. We need to leave the tabs intact, but the surface that faces the reflector needs to be smooth so we can reassemble the new lenses and bulb assembly. Anyhow... here's what my emblems looked like after all the grinding.
At this point lets go ahead and start making the clear lenses.
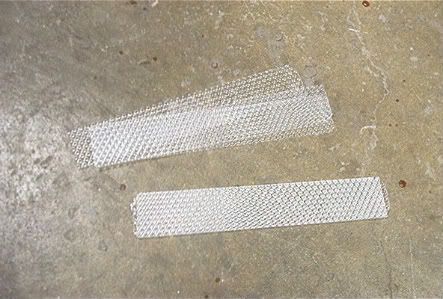
Measure the shiny metal backing plate from the reflector for the height. Set your table saw to that measurement and cut several strips of the Acrylic lighting panel.
You should now have several acrylic strips about 2" wide. Now cut those down to a size closer to the size of the metal backing plate, so they will be easier to work with.
Now the strips should be about 2"x7" or whatever you decided.
This was a pretty slick idea here: I now taped the metal backing plate to a single strip of the Acrylic. Taking note of the orientation of the front (smooth) and back (textured) so that the smooth side will be facing outward when it is assembled in to the emblem.
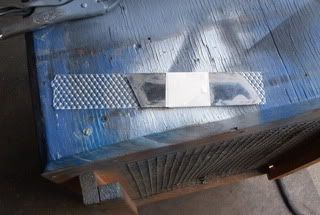
Now go take this piece over to a bench grinder and remove all the plastic around the edges, and wal~la you untape it and have 1 new clear lens cut out.....

I decided to double up the lenses on each side to 2 pieces. I think it looks better when they are stacked on top one another. So if you want to do that, cut another one.
Now use the other shiny metal backing plate from the other emblem we disassembled to cut out 1 or 2 of the lenses for the other side. Also noting the orientation of the front and back of the acrylic.
So far now, we have prepped the emblem housing and cut out new lenses.
Now is time to fabricate a housing for the light bulb. There were many ideas on how to go about this, among the best was to use LED's for the illumination. Although you could use standard size LEDs for this I don't think there would be enough room underneith the emblem assembly for the height of the LED and a circuit board. You would still have to either indent the hood mounting area or cut a section out in oreder to mount the LED powered emblem on the truck.
But, you probably could use the smaller size LEDs and get away with not having to mod the hood at all (short of a power wire hole.)
But being short on cash and not being able to order LED's or such right now I decided to go with the traditional light bulb for my project. Yes, this will require cutting the hood to clear the bulb housing in order to mount the emblem on the truck. My truck will never be a trailer queen or a show truck, but is a daily driver so... why not..... Perhaps at least this project will inspire someone else to develop a led circuit board to light up the emblem. The outcome will be identical minus the modified hood.
Now that we cleared that up.....
We will need the lamp socket and light bulb assembly to measure the width of the bulb housing. Place it along the side of your metal and take note of how much room the bulb will need.
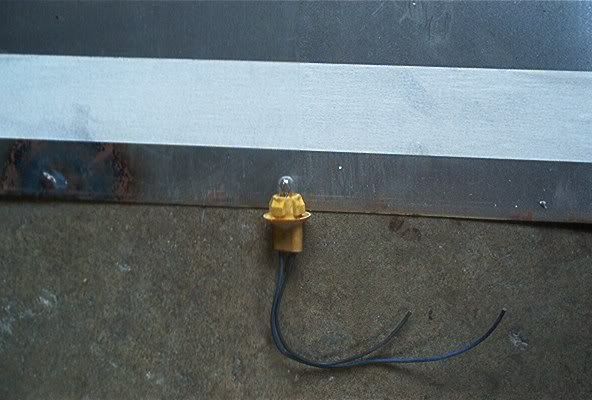
Cut a long strip of this metal to be used in creating the sides of the housing.
Remember the shiny backing plate? We need to form the wall of the housing against that form so that it matches the contour of it. You could take the easy route and create a template out of 3/4" plywood that matches the backing plate and form your metal around that. OR you can do it the hard way like I did and form it by hand. Either way, once your done forming that shape, you will need a welder, brazing setup, or some really strong adhesive to connect the two ends of the metal when you are done. I used the brazing method.
Below you can see how the shape of the metal housing I created matches the contour of the backing plate:
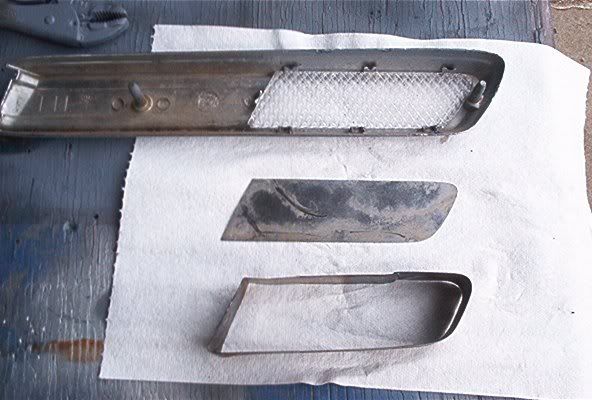
Next we need a back to our bulb housing. I did this by tracing the backing plate from the emblem on to a heavier sheet of metal and cutting it out.
You will also need to cut a hole for the light bulb itself into the back of our new housing. Now would be the time. I'm using two old parking light pig tales from a parts truck to hold the bulbs. The original way for these to mount was into a shape of a circle with both left and right , top and bottom cut out in a square " + " shape. Twist and lock into place. Myself I was lacking a file small enough to cut those square out. So I rounded down the edges of the lamp socket where the square ends would engage. If you do this they will fit snugly into a round hole.
So I cut a 1/2" round hole into the back plate of our new housing. Filed accordingly until the lamp sockets would fit snugly.
They do make sockets you can buy at the parts store that will fit into a circular hole, it would make the final assembly look better in the end.... But I'm on a budget, so spare parts it is.
Now that we made a back plate to our housing assembly, with a hole for a lamp holder, we need to attach it to the side walls of the housing. I brazed it yet again.
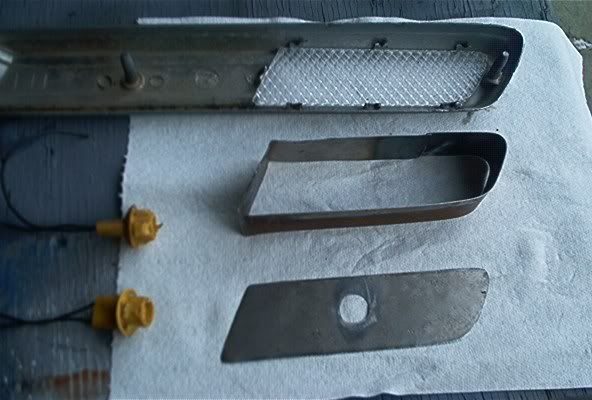
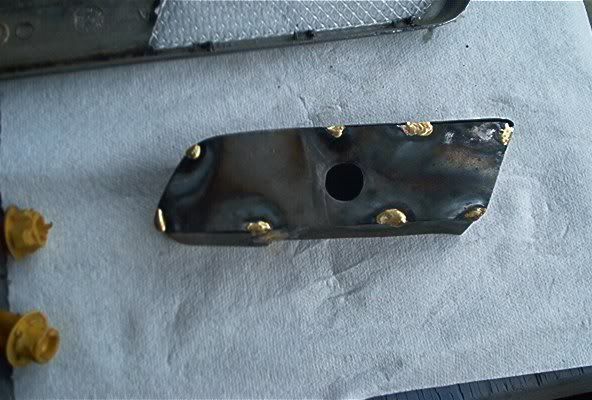
Lacking enough oxygen to fully braze around 2 entire assemblies, I tacked it in several key areas and called it good. Next it was time for grinding down the welds and a little time on the wire wheel.
I used silicone to seal the back to the sides then primed and painted the outside black / inside a shiny silver to reflect light out the lens.
So here we are at the end of Day #1 waiting for paint to dry.
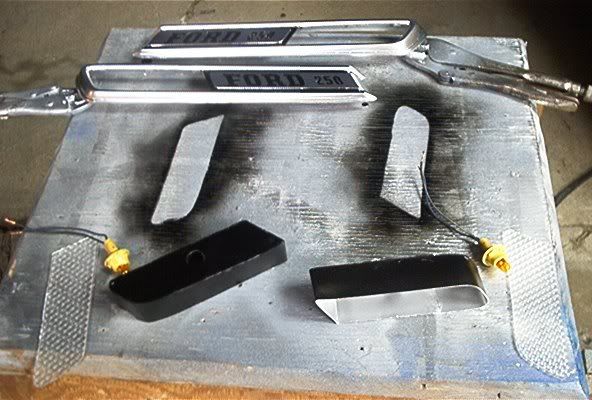
In the back you can see that I went ahead and primed / sanded / painted the emblem assemblies themselves also. They now look better than all the corroded and pitted chrome previously.
Tomorrow will be the final assembly, cutting the hood, mounting, wiring and testing. If all goes well.

1974 Ford F-100 4x4- 360 / manual.
1970 Ford F250 4x4 ~ Sold.


