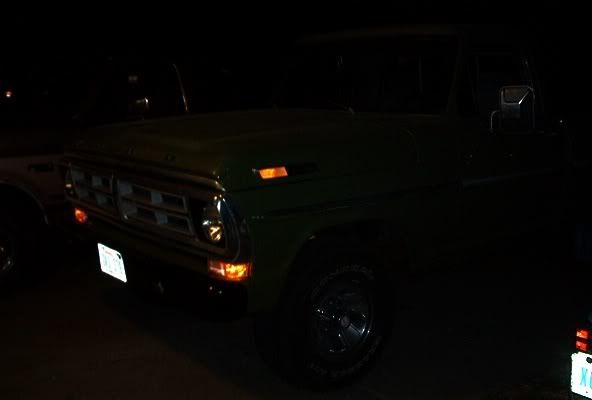
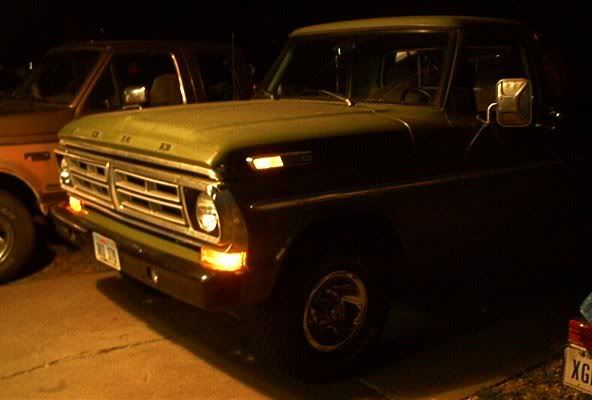
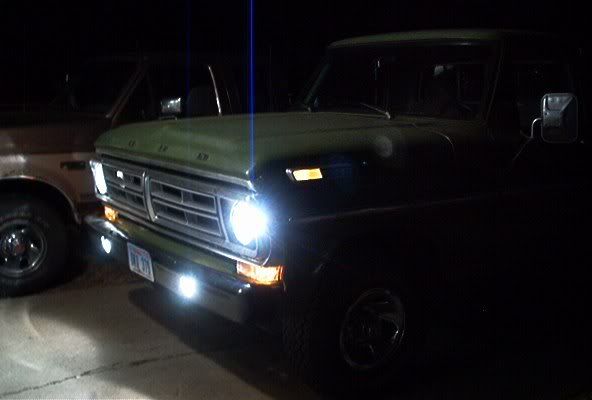
Project:Light up hood emblems DialupWarning: Lots of photos
Moderator: FORDification
- knightfire83
- Blue Oval Fan
- Posts: 567
- Joined: Thu Mar 02, 2006 8:52 pm
- Location: Nebraska, Lincoln
- Contact:
Re: Project:Light up hood emblems DialupWarning: Lots of photos
First off, thanks for everyone's interest here my replies to your posts:
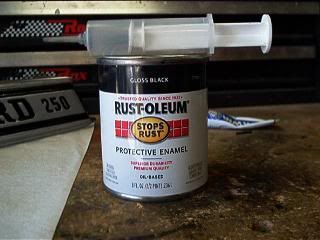
OldRedFord, I repainted the black part of the emblem with a small can of gloss black. To apply it I used a hobbyist syringe that I found at Ace Hardware. Thin the paint out a bit with Acetone to about the consistency of milk, suck it up in the cylinder and apply it carefully. With all the pitting I had to go back and do some touch up with a small paint brush the next day.
TNIceWolf, It's been my experience that when you try to make things go faster on a project, it doesn't always come out all that great. I suppose if you were careful to face the Acrylic the appropriate direction when stacking it you could cut out all the lenses at once, although the textured side of the Acrylic would make it difficult to stack the pieces. I had the time, and enjoy doing this kind of stuff~ so I cut them out one at a time.
flyboy2610, I thought about wiring the new light to alternate with the turn signals, but decided not to. However I did find some good information on the internet about how to do that here:
http://www.danielsternlighting.com/tech ... flash.html
FoMoCo, TNIceWolf is correct I used amber bulbs behind the lenses so the color would be orange when illuminated. So no worries.
And a big Thank You to everyone else. This project turned out very good, wonder why Ford didn't do this to start with (besides cost.) In my next post I'll update everyone with today's progress I'm working on it right now....
Last edited by knightfire83 on Fri May 28, 2010 7:21 am, edited 1 time in total.
1974 Ford F-100 4x4- 360 / manual.
1970 Ford F250 4x4 ~ Sold.
- knightfire83
- Blue Oval Fan
- Posts: 567
- Joined: Thu Mar 02, 2006 8:52 pm
- Location: Nebraska, Lincoln
- Contact:
Re: Project:Light up hood emblems DialupWarning: Lots of photos
Day 2:
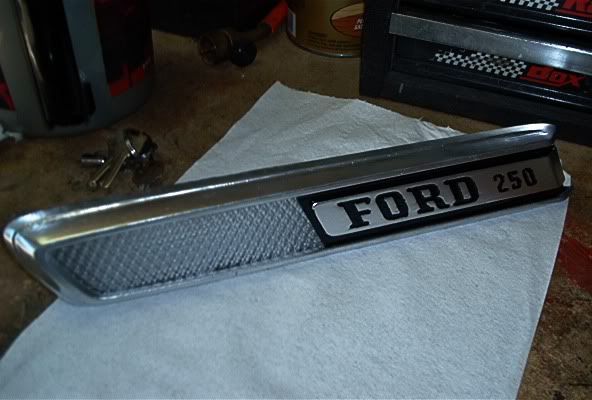
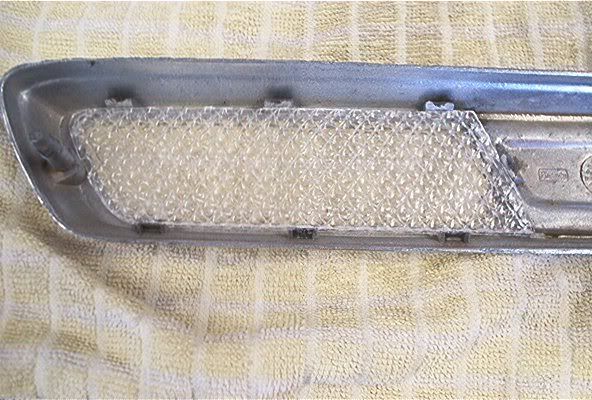
Today we start by placing the lenses into the emblems, making sure the smooth side is facing outward when mounted on the truck.
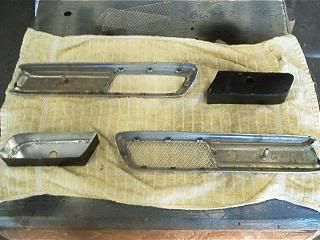
Next I placed the bulb housing over the lenses making sure that the 7 mounting tabs are on the outside of the housing. Then a problem arose. Anyone see it?
It seems that when the emblem assembly is finally mounted to the truck, there would be no way to put the speed nut on the metal post to tighten down the emblem. Glad I caught this problem before the bulb housing was mounted to the emblem permanently.
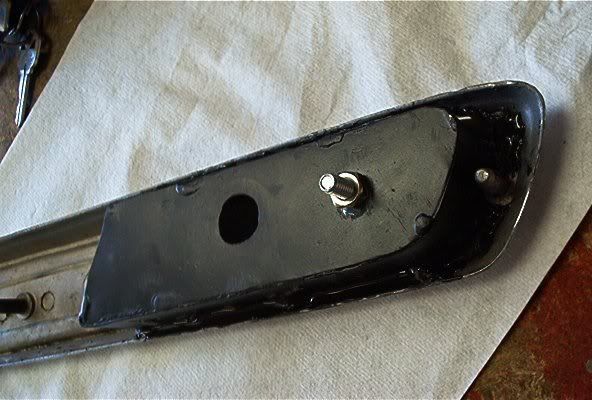
Inspired by how a aftermarket gauge is mounted, the fix was to drill a 1/4" hole in the back of the bulb housing. Mount a bolt there threads facing out, with a nut and some thread locking compound now we have a new mounting stud. More on this later.
Now that this disaster was diverted, we can actually mount the bulb housing for the last time. Place it again over the lenses ensuring that the 7 tabs are on the outside, press down firmly to set it.
The only thing I could imagine that would hold these 2 pieces together was JB Weld. If you were to try and braze it together you would melt the "pot metal" the emblem is cast from and destroy it.
As far as the JB Weld, I used 2 packages of the quick set version, 1 package for 1 emblem. I mixed about 1/3 a tube at a time and filled in the area at the bottom where these two pieces met. But first for good adhesion you need to remove the paint from the bottom area of the bulb housing as such:
All the way around.
I went completely around the bulb housing once with JB, let it set up then went around it again. The bond does have to be strong since now the bulb housing is going to support mounting the emblem to the truck via the new stud. Now it should look like this:
There was a tiny issue during the first time around with the JB Weld. When you first mix it, the JB is still somewhat thin and runny. It will run in between the two layers of Acrylic and show up on the top and bottom of the outside. So start filling the left and right edges first as the runny~ness doesn't seem to effect those areas. When the JB barely starts to thicken then do the top and bottom.
Ok this stuff sets up in about 4 minutes so work quick. After your all done, it should look like this:
JB Quick Set fully cures in 4 hours, So this would be a good time to go cut the hood to accept these new emblems.
To do this I created a template for each side. Put your new emblem assembly on top of a piece of thin cardboard, roughly the size of the emblem and trace around the base of it.
Cut the cardboard out and place it back on the emblem housing. It should fit nicely around the bulb housing, if not do some trimming. After it fits good the cardboard will stop at the top of the old mounting studs. Using a sharp awl or other pointy item make a hole where the stud is. Push the cardboard down over the metal mounts, pull it off and do some trimming until everything fits nicely. If the cardboard fits tightly, that's fine for cardboard, but the hole in the metal isn't going to give any. So make sure everything fits nice and loose.
At this time you should have a pretty good template. Mark the top of the cardboard as to the location of the top of the embelm. Now we need to transfer that template to the truck hood. To do this I placed several strips of 2" masking tape over the location of the emblem on the hood. Be sure to mask anywhere your metal cutting device may scratch the paint.
Now with the tape on there, punch out the two mounting holes on the hood, line up your template and trace it out. Be sure as to the orientation of the top of the emblem.
Now its time to cut the hood, follow the lines made from the template and cut away. This part sucks! BE SURE TO WEAR SAFETY GLASSES !!!
After I got my hood cut out things dident quite fit correctly, so I used the air powered angle grinder and sized things up. I filed all the rough areas to make it look nice and then I took the opportunity to repaint the area where the emblem resides. It looked like this:
By this time the JB probably still isn't cured all the way so lets move on to wiring.
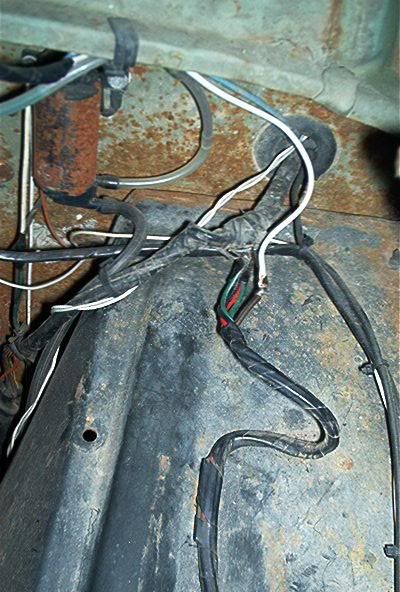
I ran a wire thru the hood left to right long enough to reach both light bulb sockets inside the hood supports. Then I ran a wire up from the bottom to this wire and tapped it. The wiring resembled a "T" when I was done. Run the wire out the back of the hood and down to the wiring harness coming out of the drivers side cab. Here you can tap the parking light circuit. It is a brown wire inside this bundle:
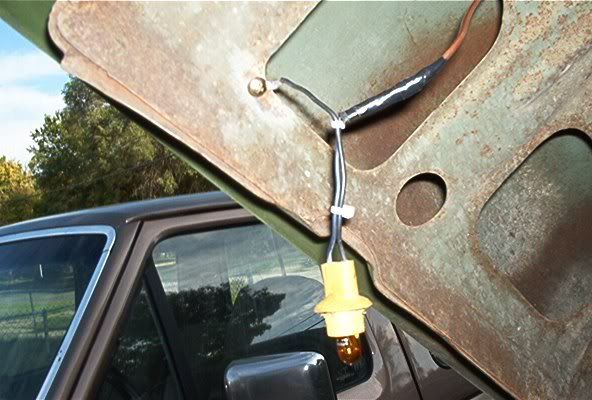
Back up top with the wires, I soldered in the light bulb holders from the parts truck. 1 wire to a ring terminal for ground, 1 wire soldered to the parking light wire we just ran.
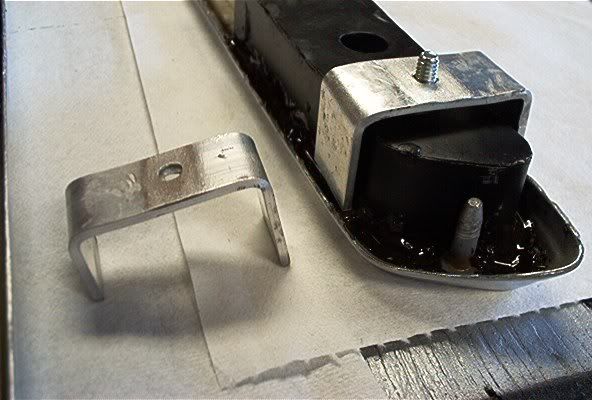
It's time to go back to the emblem housings. Again inspired by how aftermarket gauges are mounted I made a bracket out of 1/2" aluminum to go on the stud we inserted into the bulb housing. One side longer than the other to match the contour of the hood. Be sure that the two legs will reach the actual hood metal and not sink into the JB Weld. In this picture you can see the bracket I made. This was taken before I spread out the legs of the bracket as to contact the hood mounting surface.
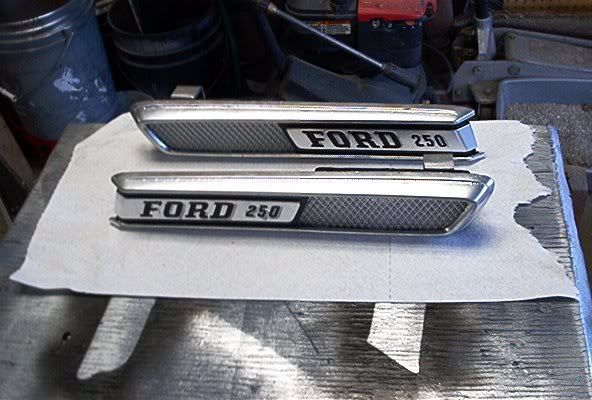
After all that fabrication, this is where I touched up all the black paint on the emblems, this is what 2 days work will get you:
Time to mount the refurbished emblems. Carefully place the assembly into the hood. Secure the rear speed nut so the emblem doesn't fall to the ground. Move on to the front where you will need to mount the bracket we made. Long leg to the bottom, short to the top. Tighten a nut on the stud a little over finger tight as it will be pulling against the newly applied JB Weld. Perhaps when the JB is fully cured, it can be tightened further.
One trick here: Before you stick in your light bulbs dip the tip of them in some kind of paint as so:
Otherwise the emblem will light up more in the center where the light bulb is than the rest of the area.
Your pretty much done now assemble your light bulb into the socket and such...... Stick it in and admire your work.
This is what it looks like on the inside:
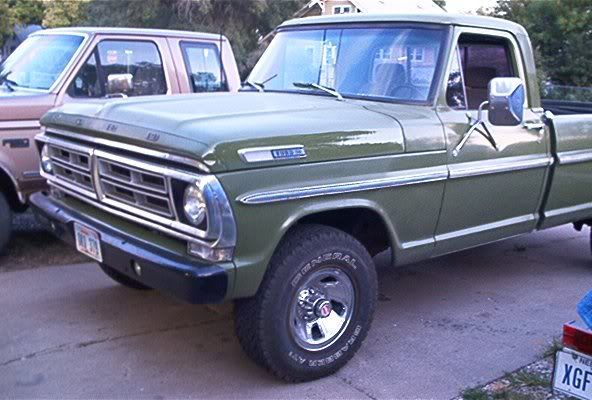
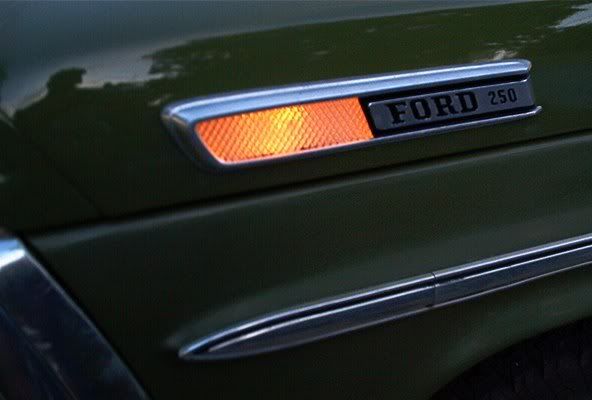
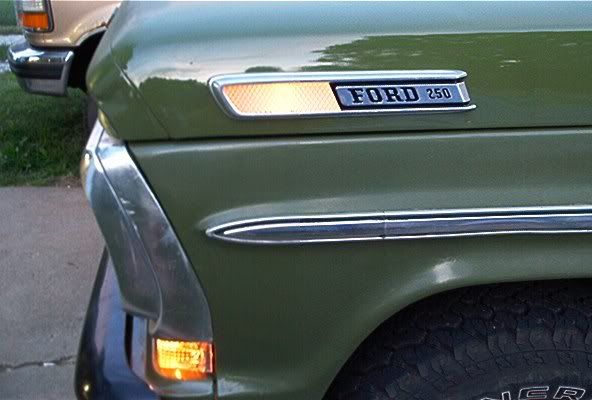
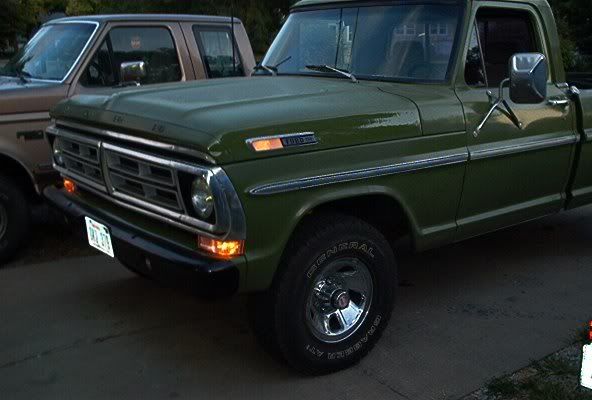
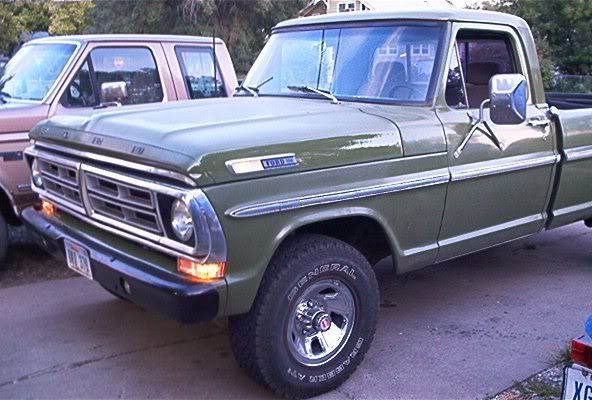
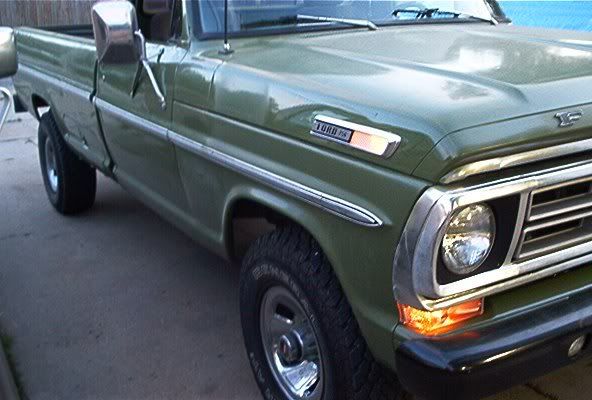
and the outside:
Now if I were to do it again, I might just use an amber or orange Acrylic for the lenses. It may have looked better or may not have?? I hate doing things half a** so next time I would take more time to form the bulb housing and a full brazing all around the cover plate. Other than that I think it turned out pretty darn good. With that bulb dipped on the tip with paint, the emblem has a nice glow that fills up the entire housing, which is very nice. It looks much better in person than it does in the pictures.
Two - 1/2 days worth of work.... Think it was worth it. Now someone should make a LED version... That could quite possibly be a product for one of the restoration companies.
Thanks everyone for the ideas!!
Today we start by placing the lenses into the emblems, making sure the smooth side is facing outward when mounted on the truck.
Next I placed the bulb housing over the lenses making sure that the 7 mounting tabs are on the outside of the housing. Then a problem arose. Anyone see it?
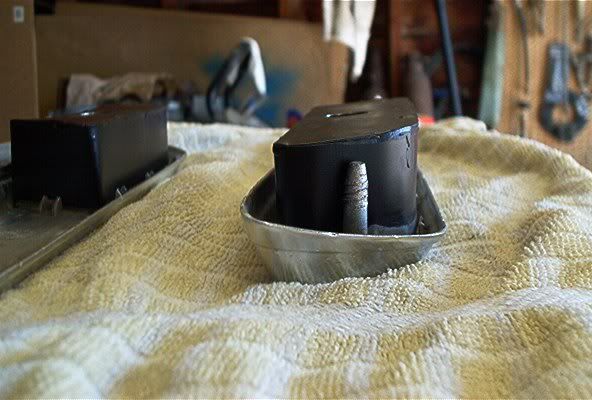
It seems that when the emblem assembly is finally mounted to the truck, there would be no way to put the speed nut on the metal post to tighten down the emblem. Glad I caught this problem before the bulb housing was mounted to the emblem permanently.
Inspired by how a aftermarket gauge is mounted, the fix was to drill a 1/4" hole in the back of the bulb housing. Mount a bolt there threads facing out, with a nut and some thread locking compound now we have a new mounting stud. More on this later.
Now that this disaster was diverted, we can actually mount the bulb housing for the last time. Place it again over the lenses ensuring that the 7 tabs are on the outside, press down firmly to set it.
The only thing I could imagine that would hold these 2 pieces together was JB Weld. If you were to try and braze it together you would melt the "pot metal" the emblem is cast from and destroy it.
As far as the JB Weld, I used 2 packages of the quick set version, 1 package for 1 emblem. I mixed about 1/3 a tube at a time and filled in the area at the bottom where these two pieces met. But first for good adhesion you need to remove the paint from the bottom area of the bulb housing as such:
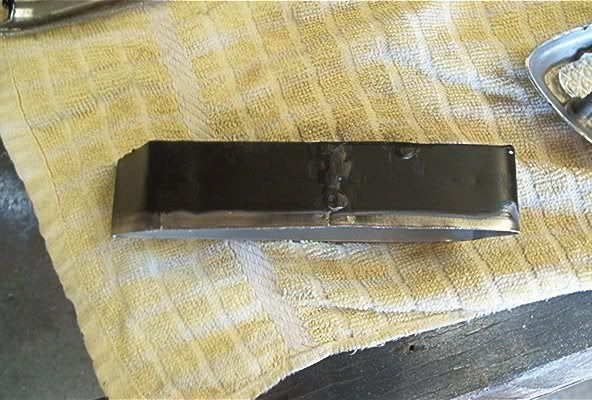
All the way around.
I went completely around the bulb housing once with JB, let it set up then went around it again. The bond does have to be strong since now the bulb housing is going to support mounting the emblem to the truck via the new stud. Now it should look like this:
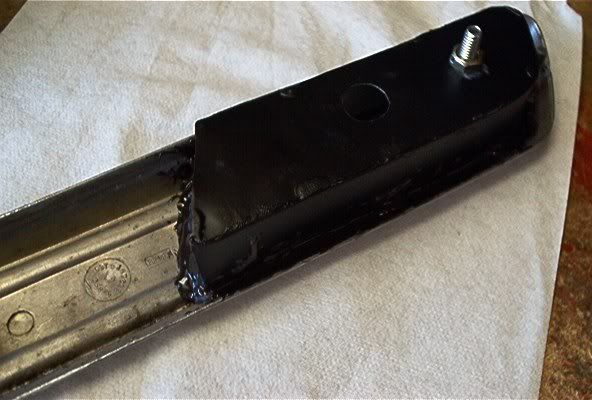
There was a tiny issue during the first time around with the JB Weld. When you first mix it, the JB is still somewhat thin and runny. It will run in between the two layers of Acrylic and show up on the top and bottom of the outside. So start filling the left and right edges first as the runny~ness doesn't seem to effect those areas. When the JB barely starts to thicken then do the top and bottom.
Ok this stuff sets up in about 4 minutes so work quick. After your all done, it should look like this:
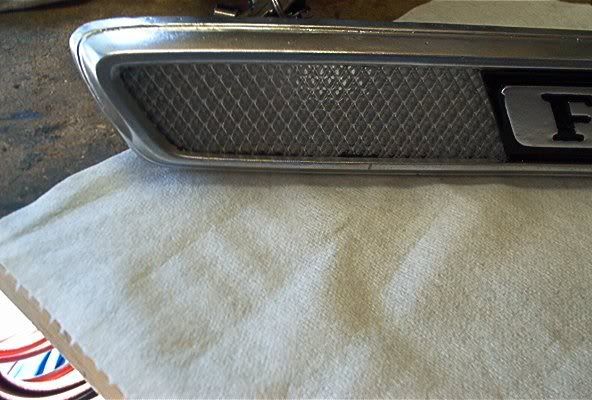
JB Quick Set fully cures in 4 hours, So this would be a good time to go cut the hood to accept these new emblems.
To do this I created a template for each side. Put your new emblem assembly on top of a piece of thin cardboard, roughly the size of the emblem and trace around the base of it.
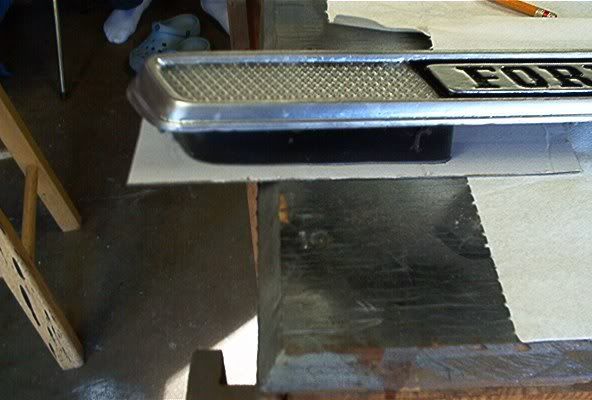
Cut the cardboard out and place it back on the emblem housing. It should fit nicely around the bulb housing, if not do some trimming. After it fits good the cardboard will stop at the top of the old mounting studs. Using a sharp awl or other pointy item make a hole where the stud is. Push the cardboard down over the metal mounts, pull it off and do some trimming until everything fits nicely. If the cardboard fits tightly, that's fine for cardboard, but the hole in the metal isn't going to give any. So make sure everything fits nice and loose.
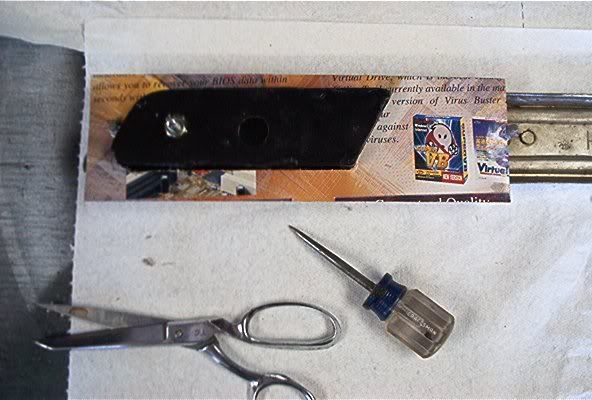
At this time you should have a pretty good template. Mark the top of the cardboard as to the location of the top of the embelm. Now we need to transfer that template to the truck hood. To do this I placed several strips of 2" masking tape over the location of the emblem on the hood. Be sure to mask anywhere your metal cutting device may scratch the paint.
Now with the tape on there, punch out the two mounting holes on the hood, line up your template and trace it out. Be sure as to the orientation of the top of the emblem.
Now its time to cut the hood, follow the lines made from the template and cut away. This part sucks! BE SURE TO WEAR SAFETY GLASSES !!!
After I got my hood cut out things dident quite fit correctly, so I used the air powered angle grinder and sized things up. I filed all the rough areas to make it look nice and then I took the opportunity to repaint the area where the emblem resides. It looked like this:
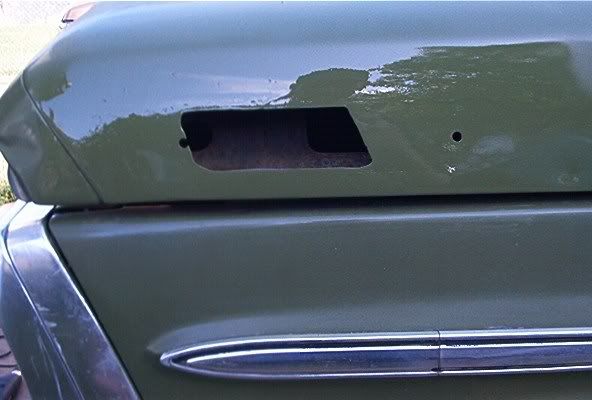
By this time the JB probably still isn't cured all the way so lets move on to wiring.
I ran a wire thru the hood left to right long enough to reach both light bulb sockets inside the hood supports. Then I ran a wire up from the bottom to this wire and tapped it. The wiring resembled a "T" when I was done. Run the wire out the back of the hood and down to the wiring harness coming out of the drivers side cab. Here you can tap the parking light circuit. It is a brown wire inside this bundle:
Back up top with the wires, I soldered in the light bulb holders from the parts truck. 1 wire to a ring terminal for ground, 1 wire soldered to the parking light wire we just ran.
It's time to go back to the emblem housings. Again inspired by how aftermarket gauges are mounted I made a bracket out of 1/2" aluminum to go on the stud we inserted into the bulb housing. One side longer than the other to match the contour of the hood. Be sure that the two legs will reach the actual hood metal and not sink into the JB Weld. In this picture you can see the bracket I made. This was taken before I spread out the legs of the bracket as to contact the hood mounting surface.
After all that fabrication, this is where I touched up all the black paint on the emblems, this is what 2 days work will get you:
Time to mount the refurbished emblems. Carefully place the assembly into the hood. Secure the rear speed nut so the emblem doesn't fall to the ground. Move on to the front where you will need to mount the bracket we made. Long leg to the bottom, short to the top. Tighten a nut on the stud a little over finger tight as it will be pulling against the newly applied JB Weld. Perhaps when the JB is fully cured, it can be tightened further.
One trick here: Before you stick in your light bulbs dip the tip of them in some kind of paint as so:
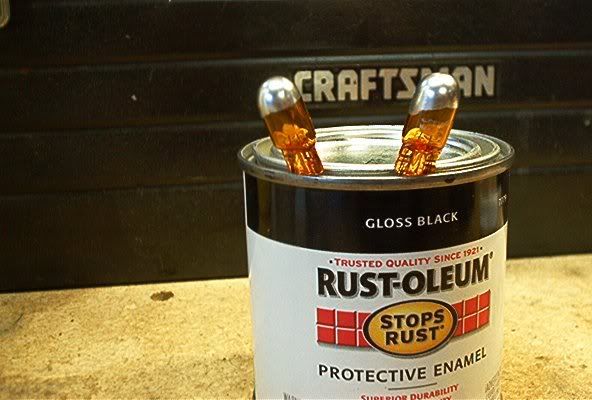
Otherwise the emblem will light up more in the center where the light bulb is than the rest of the area.
Your pretty much done now assemble your light bulb into the socket and such...... Stick it in and admire your work.
This is what it looks like on the inside:
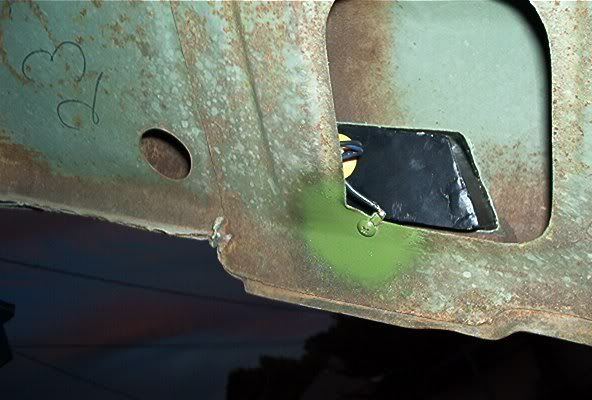
and the outside:
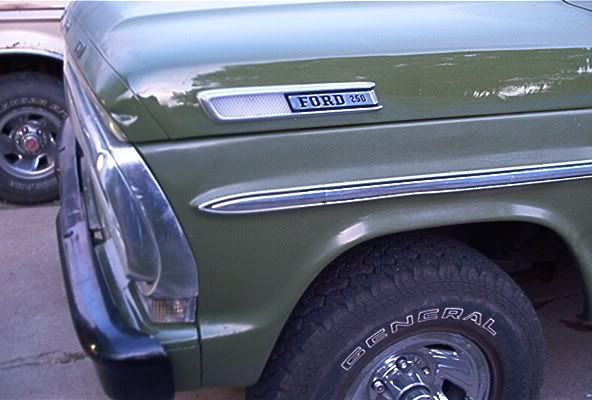
Now if I were to do it again, I might just use an amber or orange Acrylic for the lenses. It may have looked better or may not have?? I hate doing things half a** so next time I would take more time to form the bulb housing and a full brazing all around the cover plate. Other than that I think it turned out pretty darn good. With that bulb dipped on the tip with paint, the emblem has a nice glow that fills up the entire housing, which is very nice. It looks much better in person than it does in the pictures.
Two - 1/2 days worth of work.... Think it was worth it. Now someone should make a LED version... That could quite possibly be a product for one of the restoration companies.
Thanks everyone for the ideas!!
Last edited by knightfire83 on Fri May 28, 2010 7:35 am, edited 1 time in total.
1974 Ford F-100 4x4- 360 / manual.
1970 Ford F250 4x4 ~ Sold.
-
- Preferred User
- Posts: 462
- Joined: Wed Dec 27, 2006 12:00 pm
- Location: SoCal
Re: Project:Light up hood emblems DialupWarning: Lots of photos
That looks great! Thanks for sharing.
2015 Camaro-2001 GMC Safari-1984 F250 6.9/T19 2wd-1974 Dodge D100 short fleetside~ 72 wife ~ late model kids, a Chocolate Lab named Coco and a white rabbit named Marshmallow...now I need a ferret named Graham and I will have S'mroes!!!..
- flyboy2610
- 100% FORDified!
- Posts: 4901
- Joined: Sun Oct 03, 2004 6:42 pm
- Location: Nebraska, Lincoln
Re: Project:Light up hood emblems DialupWarning: Lots of photos
Thanks for the link! I bookmarked it!knightfire83 wrote:
flyboy2610, I thought about wiring the new light to alternate with the turn signals, but decided not to. However I did find some good information on the internet about how to do that here:
http://www.danielsternlighting.com/tech ... flash.html
"If the women don't find you handsome, they should at least find you handy."
Red Green
If you're going to live like there's no hell...............
you'd better be right.
http://theworldasiseeit-flyboy2610.blog ... ee-it.html
Red Green
If you're going to live like there's no hell...............
you'd better be right.
http://theworldasiseeit-flyboy2610.blog ... ee-it.html
- ford4x4fun
- Blue Oval Guru
- Posts: 1468
- Joined: Sun Dec 02, 2007 8:38 pm
- Location: Cadiz, KY
- Contact:
Re: Project:Light up hood emblems DialupWarning: Lots of photos
That is just plain cool! They Turned out real nice
CNR Radio Instructor
US ARMY Retired
1971 Ford F100 4x4 (390)
2015 Ford F250 Crew Cab 6.7l
US ARMY Retired
1971 Ford F100 4x4 (390)
2015 Ford F250 Crew Cab 6.7l
-
- New Member
- Posts: 110
- Joined: Thu Jan 08, 2009 12:50 pm
Re: Project:Light up hood emblems DialupWarning: Lots of photos
Those look AWESOME!!! I have been thinking of doing that on my '68. I'm definately looking at the led option now!
1968 F100
1992 F150 4X4
2002 Ranger Edge
1992 F150 4X4
2002 Ranger Edge
- SteveC
- Blue Oval Guru
- Posts: 1091
- Joined: Mon Oct 29, 2007 11:04 pm
- Location: Nebraska, North Platte
- Contact:
Re: Project:Light up hood emblems DialupWarning: Lots of photos
wow that just looks awesome next time im down in Lincoln ill know if its you by seeing those lights on.
Im down there at least 1-2 times a year
I don't really care about brands Chevy Ford Dodge ...as long as it doesn't sound like two old dudes farting in a coffee can.
http://s169.photobucket.com/albums/u223/imabaka70/ Projects listed on the left side
WOOOT!! i passed my mechanics classes. Now working as a mechanic and waiting to go for my ASE certifications.
1967 f-100 4x4
1969/72 f100 351w EFI m5r2 5 speed
1988 ford f150 xlt lariat
1961 VW Beetle (wifes car)
http://s169.photobucket.com/albums/u223/imabaka70/ Projects listed on the left side
WOOOT!! i passed my mechanics classes. Now working as a mechanic and waiting to go for my ASE certifications.
1967 f-100 4x4
1969/72 f100 351w EFI m5r2 5 speed
1988 ford f150 xlt lariat
1961 VW Beetle (wifes car)
- rjewkes
- 100% FORDified!
- Posts: 3711
- Joined: Sun Apr 17, 2005 1:09 am
- Location: Missouri, Webb City
- Contact:
Re: Project:Light up hood emblems DialupWarning: Lots of photos
cool deal with the leds you may even get away with a bulb for turn and a bulb for running how to get the turn brighter than the running i have no idea. or even get it one bulb but get the running light to cut out and have it blink without shorting both circuits. are there cars setup like the diagram where the ground is setup like the second diagram on that page? sounds like with both turned on the entire harness would catch fire.
The clear looks extra sharp during the day i imagine.
"It is better to keep your mouth shut and appear stupid than to open it and remove all doubt." - Mark Twain
'70 f250 4x4 Crew cab 460/C6 '72 F100 390/C6 9.8 MPG AVG. '89 Mercury Cougar LS Dual Exh. V6 . 18.9 MPG AVG. In Town.
I don't want to give em a heart-attack. That is what would happen if I answered the door in the buff. Heck it almost scares me to death when I step out of the shower and look in the mirror.~Mancar1~
fuelly.com
- kaptnkaos
- 100% FORDified!
- Posts: 2029
- Joined: Thu Feb 16, 2006 1:27 am
- Location: Washington, Elma
Re: Project:Light up hood emblems DialupWarning: Lots of photos
Very nice knightfire83...
Are they just markers, or do the blink with the turn signals?
Either way, you did a good job..
I've played with the idea, as I'm sure we all have, but never got any further than that...
Anyway, now I know it can be done and look great.
KaptnKA S
Are they just markers, or do the blink with the turn signals?
Either way, you did a good job..
I've played with the idea, as I'm sure we all have, but never got any further than that...
Anyway, now I know it can be done and look great.
KaptnKA S
Washington...The land where rust is like the family pet...Ya learn to live with it and clean up after its mess... KaptnKAOS
"Olde Skool" '68 Ford Bluebird short bus
"FRODO" '68 F-250 Camper Special project
"Olde Skool" '68 Ford Bluebird short bus
"FRODO" '68 F-250 Camper Special project
- knightfire83
- Blue Oval Fan
- Posts: 567
- Joined: Thu Mar 02, 2006 8:52 pm
- Location: Nebraska, Lincoln
- Contact:
Re: Project:Light up hood emblems DialupWarning: Lots of photos
Just markers, but it would be just as easy to make them alternate with the turn signals too.
1974 Ford F-100 4x4- 360 / manual.
1970 Ford F250 4x4 ~ Sold.
-
- Blue Oval Fan
- Posts: 628
- Joined: Tue Jul 20, 2004 2:52 am
- Location: Texas, Houston
- Contact:
Re: Project:Light up hood emblems DialupWarning: Lots of photos
Yea, but that's not a forward looking light like a parking light.FoMoCo wrote:In Ohio, the State Patrol would ticket you for having white lights on other than headlights. I've been pulled over for leaving a cargo light on. I like your idea but be carefull regarding the DOT law.
NICK
It's a side marker light. So seems to me it should be perfectly
legal being as the government has required those side marker lights
on U.S. cars since 1968. I guess trucks were exempt in the early years
of that law. IE: My F-250 is a 68, and it only has reflectors, same as
the knightfires's.
I don't see how they could enforce that being as many of the newer cars
you can see yellow off the sides with no much angling over to the side.
IE: My 05 Corollas headlights also light up a yellow section on the sides
so it can pass the side marker light rule. You can see that yellow just as
easy as you would that truck. Heck, trucks had factory front yellow side
marker lights after whatever year they applied that to trucks as well as
cars.
1968 F-250 / 300 six / T-18
Dana 60 - 4.10 Limited Slip
- FLATBEDFORD
- 100% FORDified!
- Posts: 1818
- Joined: Sat Feb 18, 2006 1:34 pm
- Location: New York, Crugers
- Contact:
Re: Project:Light up hood emblems DialupWarning: Lots of photos
That looks great. An obvious upgrade that I too have been thinking about for years. Good to see that somebody finally did it, and quite nicely too. Now your truck needs some marker lights on the roof.
Steve
1970 F350 DRW Factory 9' Platform/Stake, 360, T18.
Passed on to new care taker July, 2013
My Photo Gallery
http://s115.photobucket.com/albums/n298/flatbedford/
1970 F350 DRW Factory 9' Platform/Stake, 360, T18.
Passed on to new care taker July, 2013
My Photo Gallery
http://s115.photobucket.com/albums/n298/flatbedford/
- kaptnkaos
- 100% FORDified!
- Posts: 2029
- Joined: Thu Feb 16, 2006 1:27 am
- Location: Washington, Elma
Re: Project:Light up hood emblems DialupWarning: Lots of photos
I don't see where there would be a problem complying with any state laws.
Because knightfire83 used amber bulbs they glow amber when the lights are on, even though the lens is clear, it emits no white light.
Personally, I think I would have used the stock amber lenses, but that would only be my preference and would not matter as far as legalities are concerned.
KaptnKA S
Because knightfire83 used amber bulbs they glow amber when the lights are on, even though the lens is clear, it emits no white light.
Personally, I think I would have used the stock amber lenses, but that would only be my preference and would not matter as far as legalities are concerned.
KaptnKA S
Washington...The land where rust is like the family pet...Ya learn to live with it and clean up after its mess... KaptnKAOS
"Olde Skool" '68 Ford Bluebird short bus
"FRODO" '68 F-250 Camper Special project
"Olde Skool" '68 Ford Bluebird short bus
"FRODO" '68 F-250 Camper Special project
- knightfire83
- Blue Oval Fan
- Posts: 567
- Joined: Thu Mar 02, 2006 8:52 pm
- Location: Nebraska, Lincoln
- Contact:
Re: Project:Light up hood emblems DialupWarning: Lots of photos
Your right, I was debating this very thought all last night....FLATBEDFORD wrote: Now your truck needs some marker lights on the roof.
Just ordered some off E-bay, not 5 minutes ago.
1974 Ford F-100 4x4- 360 / manual.
1970 Ford F250 4x4 ~ Sold.